Iron farm in Minecraft - a structure that can be built in the world and automatically extract a resource without wasting time searching and collecting it. As a result of its activities, the supply of iron ingots will be replenished without requiring intervention. Using this metal you can craft a large number of useful items, including pickaxes, comes, hoes, grates, and so on.
In the guide we will tell you how to make an iron farm in Minecraft to collect the resource automatically, and what materials are needed for this.
What is an iron farm in Minecraft?

An iron farm is an endlessly running automatic system that works independently, without direct intervention from the player. As a result of its activity, iron is formed in large quantities while the owner of the world is in AFK or engaged in other matters. Resource reserves are replenished automatically, and you no longer have to waste time and effort on manually extracting metal ingots.
How to build an automatic iron farm

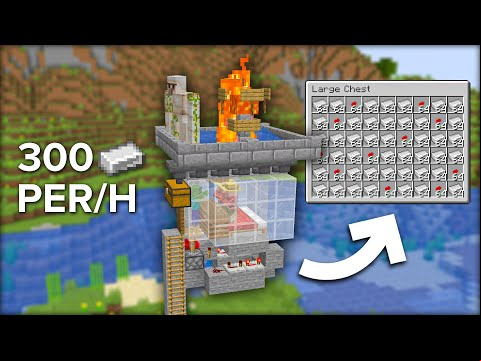
The finished structure works according to the following principle: residents placed inside the building are frightened by zombies and summon a golem. Access to the enemy is limited, and the mob ends up on the top floor of the farm, trying to kill the troublemaker. There, water flows bring the golem to the lava, it dies, and a certain amount of resource falls from it. Transportation of loot to the chest is carried out using specially placed funnels nearby.
Next, we’ll take a closer look at how to make an iron farm in 1.20. Please note that this design will not work in the Bedrock Edition, since in it the golem is summoned by 20 residents who have a profession.
Preparation and selection of location
The structure should be installed in places where a golem can spawn. In a properly built farm, they are called upon by residents, so find a location far from the village - otherwise the system will malfunction. In addition, you need to choose a flat place so that the golems spawn in the farm itself, and not outside on the hills nearby.

For construction it is necessary to accumulate the following materials:
- time blocks – 64;
- building blocks – 42;
- glass – 41;
- wall – 26;
- staircase – 8;
- hatch – 9;
- plate – 8;
- funnel – 5;
- redstone repeater – 4;
- composter – 3;
- redstone dust – 2;
- bed – 3;
- bucket of water – 2;
- lava bucket – 1;
- chest – 1;
- piston – 1;
- redstone torch – 1;
- tag – 1.
Construction Stages

The first step is to erect a vertical column of five temporary blocks so that the future structure is located at a height above the ground. Place a building block on top and a piston above it. It will become a platform on which there will be a zombie bait for golems.
Place one temporary one on the side of the building block, and from it draw a line of building blocks three cubes long. Next, place a temporary block in front of the formed line, and then place a construction block parallel to the pillar. Leave one temporary cube nearby, and then two more towards the piston.
Install a redstone repeater on four cubes located in pairs opposite each other. Hit each one several times so that the posts on the fixture are as far apart as possible.
Then place redstone dust on the two remaining points - it connects the repeaters to each other and to the piston, so that it subsequently becomes movable.

Close the perimeter of the structure with three building blocks, placing them one unit higher than the rest.
Then cover the truss blank with a 2-by-3 building platform, placing the cubes over the repeaters. Then place three beds in this space with piston pillows.
Near the beds on the side where the piston is located, place three composters in one line and cover each of them with a hatch.
In the center, above the piston, attach a temporary block to the structure. Then place three hatches next to it: two should be at the bottom and top of the cube, and the third should be at the top. Flip them upright to create a vertical board that is perpendicular to the beds.
On either side of the hatch partition, create two columns, each of three building blocks. Destroy the temporary block above the piston - it will no longer be useful.
Place a solid glass wall three units high around the beds, enclosing the resulting room. Then place three more hatches along the top level of the structure, parallel to those covering the composters.
Now build a staircase of temporary blocks from the ground to the room, equipping it with rails. Use the minecart to move the villagers inside the building.
Place a chest next to the column of building blocks, and place a funnel above it. Draw a series of four more funnels along the glass wall towards it.

Cover the building with villagers inside with a roof made of building blocks: golems will spawn on it, which are needed to generate iron ingots. Leave the point above the piston empty - a zombie will be placed in the resulting niche.
Build another staircase from temporary blocks, along which you need to drive the zombie and lure him into a trap. To do this, wait for the mob to appear nearby and climb the steps, making sure that he follows. As a result, the zombie should fall into a pit with a piston at the bottom. At this stage it is worth giving him a tag to avoid despawn. Cover the pit with a block and get rid of the ladder the mob climbed up.
Draw a wall along the perimeter of the roof of the structure, and place two more parts of the wall vertically above the central funnel. Place four signs around the top block.
Hang four more signs above the resulting pillar. Place a block of lava between them, and fill the resulting pool with two buckets of water in the corners farthest from the funnels. At this point, the process will start: the flow pushes the golem towards the lava, it burns, and the loot that falls out of it is sent into the craters.

Destroy the time block stand. Now the structure should be entirely in the air, in a floating state.

Directly below the chest, build a glass column 8 units high, starting from the ground. Then take the ladder up it to climb up to the vault.
As a final touch, place a redstone torch next to the piston to control the mechanisms in the building. Now the piston was activated, setting the zombie on it in motion.
You can take a closer look at each stage of construction in the video:
Farm inspection and testing
This completes the farm construction process. To test its effectiveness, leave the game in afk for a while, and then climb the specially constructed stairs to the chest and check the supplies. Make sure that the golem actually gets affected by the lava and dies, and the items obtained from it are sent to the combined vortex system.
Farm improvement and optimization

To increase the amount of resource received, you can increase the size of the farm by building a similar structure nearby. In this case, the distance between the two structures must be at least sixteen blocks - otherwise, the spawning of golems will work incorrectly or in smaller quantities.
You can also optimize resource productivity by connecting four structures so that the golems are sent to one pit through water channels. To do this, modify the roofs so that the generated monsters roll down through the water, move to the center of the system and burn in one pit.
Frequent problems
Often the farm turns out to be ineffective because the golems do not spawn. In this case, check the following points:
- do not build a farm in the immediate vicinity of the village, so that there are no other golems in the vicinity;
- remove the torch for the first night so that the villagers can adapt to the new place;
- make sure that the beds are positioned with their headboards facing away from the zombies.
If golems spawn not in the farm itself, but outside under it or nearby, it means that the place was chosen not flat enough. In this case, you will have to adjust the landscape manually. You should also make sure that the building is located at a height of five blocks from the ground or higher.
Сonclusion

As a result of the activities of such a farm, you will receive approximately 300 iron ingots every hour. At the same time, you can be in AFK, or mind your own business, which greatly simplifies the process of accumulating resources. Crafted iron ingots can be used to craft comes, minecarts, axes, helmets, pickaxes, buckets, rails, swords, hatches, iron blocks, hoes, shovels, pistons, hoppers and so on. In addition to iron ingots, golems can also drop poppies, from which it is possible to make red dye.
We hope this guide helped you create an endless iron farm in Minecraft. If anything remains unclear, ask questions at comments. Follow others game guides on our website.