Seahorse of the thousand-year-old pearl Emperor of fire and iron, is one of the oldest foreigners of Fontmer, who later turned into two rulers. Previously he was an ordinary bubble skate, but was able to evolve, becoming stronger and changing his appearance.
In this guide, we will tell you where to find and how to defeat the Thousand-Year Pearl Seahorse, as well as which characters need the materials dropped from it to ascend.
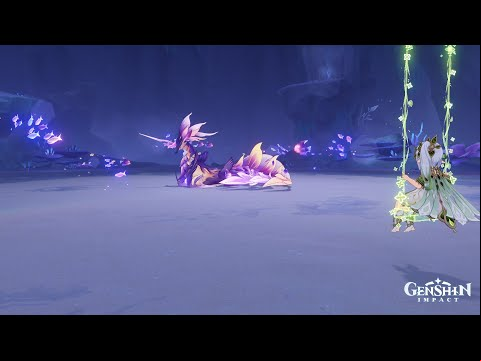
How to get to the Millennium Pearl Seahorse in Genshin Impact

You can find the Thousand-Year Pearl Seahorse in one of the underwater caves Fontaine, in the Liffey area. Start your path from the underwater teleport, which is located on the map just below the boss himself.

After you move, turn your character to the north and swim a little to the left. From a distance you will notice a large cave, the entrance to which is highlighted by a light blue glow.
Swim towards her. Along the way you will come across huge algae, one Fontmer's aliensguarding the chest.
Don't forget to pick up hydrocool or mark it on the map to take later. Behind it there are special underwater mechanisms that will make the route easier: a whirlpool and a ring of turbulence.

Use them to make it easier to go through the tunnel. Thanks to the whirlpool, the character will receive constant acceleration without wasting stamina, and the rings will help maintain high speed.
Swim through the rings regularly throughout your journey.
Soon you will come across a transparent barrier of water. It marks the end of the tunnel. Swim through it and find yourself in a small pond.
Don't forget to open the rich chest and swim up into the inner cave.
Activate the teleport to easily return to the boss in the future. Walk forward a little and you will see a Seahorse lying on an island in the middle of the cave.
Fly to the platform and approach the beast. The battle will automatically begin as soon as you disturb him.
Video with a detailed route to the Seahorse of the Thousand-Year Pearl:
Who to take into your squad to fight the Seahorse of the Thousand-Year Pearl

The seahorse of the thousand-year pearl has an Electro element and has increased resistance to this element (60%). Do not take Electro characters into your squad, so as not to encounter problems in dealing damage to the boss.
In combat, the seahorse uses mechanics that protect it during combat. Attack him with elemental reactions to weaken him. To do this, take into your squad those heroes who interact best with Electro - Pyro, Cryo, Hydro, Dendro. Please note that there is no priority element with which to destroy the enemy’s defense faster.
The boss is quite mobile and also often attacks in an area. Take s into your squad to protect your team from damage. It is also recommended to use ranged characters, since during battle the boss often leaves puddles that cause periodic damage.
Character selection
Let's take a closer look at the heroes you can take into battle with the Seahorse of the Thousand-Year Pearl.
Main DD
Heroes who will cause the main damage in the squad:
| Character | Element | Weapon | Effects |
|---|---|---|---|
 Eimia
Eimia |
 Pyro
Pyro |
 Bow
Bow |
Deals a lot of damage from afar, being at a safe distance from the boss. |
 Lini
Lini |
Pyro |
Bow |
Like Eimiya, Pyro is an archer who can shoot the Seahorse from a distance. |
 Yanfei
 |
Pyro |
 Catalyst
 |
A pyro catalyst that can deal a lot of damage both at long range and up close. |
 Hu Tao
 |
Pyro |
 A spear
 |
She is a melee character, but her huge damage will help to quickly deal with the boss. |
 Ganyu
Ganyu |
 Cryo
Cryo |
Bow |
Attacks with charged shots that deal massive Cryo damage over an area. However, due to low mobility, it is necessary to have a shield member or healer in the squad. |
 Wriothesley
 |
Cryo |
Catalyst |
Cryo catalyst, attacking at close range. Since he constantly attacks with an element, he is able to quickly cause the reactions necessary to weaken the boss. |
 Tignari
 |
 Dendro
 |
Bow |
Possesses the Dendro element, which is ideal for fighting the Electro boss due to the constant triggering of reactions. Fast reloading of arrows will make it easier to adapt to the boss's mobility. |
 Ayato
Ayato |
 Hydro
Hydro |
 One handed sword
 |
Hydro quickly attacks with normal attacks under the skill, and also covers a large area with his ult. However, it is worth considering that Ayato’s infusion does not last long, so before activating the E-shka, it is advisable to select the moment when the boss stops in one place. |
 Neuvillette
 |
Hydro |
Catalyst |
A Hydro Catalyst, capable of effective long-range attacks with charged attacks. |
Sub-DD
Secondary damage dealers required for additional damage:
| Character | Element | Weapon | Effects |
|---|---|---|---|
 Nahida
 |
Dendro |
Catalyst |
A convenient pocket Dendro damage dealer that deals huge damage from marks. Can also increase elemental mastery. |
 Ye Lan
 |
Hydro |
Bow |
A universal Hydro sub-damor that attacks in parallel with the main damage dealer. She is also very mobile due to her skill. |
 Xingqiu
 |
Hydro |
One handed sword |
Like Ye Lan, he attacks from the pocket along with DD attacks, but also protects and heals the active character. |
 Mona
Mona |
Hydro |
Catalyst |
Capable of increasing group damage with Omen, as well as giving Hydro status to enemies. |
 Xiangling
 |
Pyro |
A spear |
Excellent Pyro sub-deader, dealing damage with his ult and helping to trigger reactions. In addition to the ult, it is capable of leaving Gobu in a specific place where Pyro status is needed. |
 Rosary
 |
Cryo |
A spear |
Increases crit. chance to squad and activates an ult that deals periodic Cryo damage. |
 Albedo
 |
 Geo
Geo |
One handed sword |
Deals Geo damage in parallel with damage dealer attacks. However, you need to place the flower from the elemental skill correctly so that the boss does not destroy it. |
 Kazuha
 |
 Anemo
Anemo |
One handed sword |
Inflates the elements, absorbs one of the elements and buffs elemental damage. |
 Sucrose
 |
Anemo |
Catalyst |
Like Kazuha, it is needed for inflation and absorption, but is more accessible to players and increases mastery of the elements. |
Sapports
characters that provide buff, healing or shields:
| Character | Element | Weapon | Effects |
|---|---|---|---|
 Zhongli
 |
Geo |
A spear |
A universal shield guard that protects the squad from enemy attacks. Also reduces enemy resistance using a shield. |
 Yun Jin
 |
Geo |
A spear |
Increases the damage of the active character's regular attacks, helping similar damage dealers deal with the boss faster. |
 Bennett
 |
Pyro |
One handed sword |
Heals allies and also increases them attack power. It has a quick rollback of E-shki, therefore it is able to participate in causing reactions. However, it is worth considering that his ultimate has a limited range and may be inconvenient with a mobile boss. |
 volumes
 |
Pyro |
A spear |
Gives a shield to allies and deals additional damage in parallel with their attacks. |
 Laila
Laila |
Cryo |
One handed sword |
Cryo shieldman, capable of dealing damage from his ultimate and shield. |
 Dione
Dione |
Cryo |
Bow |
With the skill, hangs a shield, and with the ult, heals allies within the area. |
 Kokomi
 |
Hydro |
Catalyst |
Capable of healing allies, as well as dealing damage and at the same time giving Hydro status. It is worth placing the jellyfish wisely on the battlefield, since healing is only possible in a narrow radius of action. |
 Bai Zhu
 |
Dendro |
Catalyst |
Healer, perfect for squads with Dendro damage dealer due to his ive ability. However, it is worth considering that his shield will not be able to protect against the boss’s attacks. |
 Yao Yao
 |
Dendro |
A spear |
Another Dendro healer, but more accessible to most players. |
 Kirara
 |
Dendro |
One handed sword |
A shield warrior who can attack from the pocket using his ultimate. |
Top Teams
Using the characters presented above, you can assemble the following units to fight the Millennium Pearl Seahorse:
| Character 1 | Character 2 | Character 3 | Character 4 | Features |
|---|---|---|---|---|
|
Eimia |
Xingqiu
Ye Lan |
Bennett |
Yun Jin |
A unit that plays from Yeimiya's normal attacks, which causes reactions under Hydro from Xingqiu or Ye Lan. Bennett and Yun Jin are needed for : increased damage and healing. |
|
Yanfei |
Xingqiu |
Bennett |
Sucrose |
Team via Par with Yanfei. It works like the previous group, but the role here is played by Sucrose, which will also give elemental mastery. |
|
Lini |
Xiangling Zhongli
 |
Bennett |
Kazuha |
Mono-Pyro squad through Line with the Dispersal reaction from Kazuha. If necessary, Xiangling can be replaced by Zhongli in the set archaic stone, to increase Lini’s own damage and provide protection from boss attacks. |
|
Hu Tao |
Xingqiu
Ye Lan |
Albedo |
Zhongli |
Team with Hu Tao and Geo Resonance. Geo characters will provide protection and cut resists, Albedo will increase elemental mastery. The Hydro character puts on a permanent Hydro status, which will cause Hu Tao to deal huge damage. |
|
Ganyu |
Rosary |
Kokomi |
Kazuha |
Freezing does not affect bosses, but this combination of reactions is convenient for destroying the Pearl of Foreign Seas. Try to use Kazuha to inflate your Cryo status to deal increased damage with Ganyu. |
|
Wriothesley |
Mona |
Dione
Laila |
Kazuha |
A unit similar to the previous one in operating principle, but specializing in close combat. Mona will increase the damage of Omen, and Cryo Shield will give protection to the team. |
|
Tignari |
Nahida
Bai Zhu
Yao Yao |
Xiangling |
Mona
Kokomi |
Team through Bloom. Hydro and Dendro characters will create Buds, which Xiangling will subsequently explode. It is recommended to take at least one healer into your squad. |
|
Ayato |
Xiangling |
Bennett |
Kazuha |
Standard squad with Ayato via Par reaction. Kazuha inflates the elements, Bennett increases the damage. Ayato and Xiangling will do the bulk of the damage. |
|
Neuvillette |
Xiangling |
Laila |
Sucrose |
Squad with Nevillet through various reactions with Pyro and Cryo. It is better to take Layla rather than Diona, due to her higher Cryo status. Xiangling is highly desirable to score at least 220% energy recovery, the spear of Favonius will perform very well. |
Budget detachments
Commands for beginners using standard characters:
| Character 1 | Character 2 | Character 3 | Character 4 | Features |
|---|---|---|---|---|
 Keia
Keia |
Xiangling |
 Barbara
 |
 Noelle
 |
Squad through the Melting reaction from Kaya and Xiangling. Barbara and Noelle are needed to protect allies with shields and healing. |
 Ember
Ember |
Xiangling |
Barbara |
 Lynette
 |
A team focused on medium to long range damage with Ember's charged attacks. Xiangling deals extra damage with her ultimate, and Lynette inflates her Pyro status. |
 Dendro GG
 |
Barbara |
Xiangling |
 Collei
 |
A squad from Blossom with Dendro the Traveler. Dendro GG and Kollei close Dendro's resonance, increasing the elemental mastery of the entire squad, Barbara heals and creates buds. Xiangling deals additional damage and explodes Dendro Cores. |
Boss attacks and abilities
Let's take a closer look at all the Seahorse's attacks.
Pearl of the other sea
 An Electro crystal located under the boss's head, near the neck. Increases his damage and defense by 80%.
 Destroy the pearl using elemental reactions, after which the Seahorse will change its appearance and become vulnerable to attacks.

Fontmere's Ancient Thunder
It rises up and, with the help of its horn, accumulates Electro energy, during which it creates three resonating coral spheres. Please note that dangerous zones will begin to appear next to the spheres, which will greatly reduce the character’s health.

Destroy all orbs using elemental reactions to damage the Pearl of Othersea.
Jumping
Jumps upward, storing lightning power in its front legs and dealing area damage with them upon landing. After that, he rears up and deals damage again.
Jerk

Accelerates and makes a dash towards the character. Run away to avoid the attack.
Electric fish ring
Points with a horn and creates a ring of fish around the character that follows him. After some time, the area explodes and causes damage if you do not have time to quickly run out of its circle.
Electric ground

At the site of his attacks he leaves a small zone in which the character is assigned Electro status. The effect works even through the shield and wears off some time after entering neutral ground. Be careful when using skills that give the enemy Hydro status in order to harm your hero.
Projectile attack

Swings its tail, charging an attack. After a moment, he directs Electro projectiles at the character. Dodge them with a dash to the side.
Tail flap

Makes a circular turn and hits the character with its tail painfully. The attack is only activated if the hero is close to the enemy.
How to Defeat the Millennium Pearl Seahorse in Genshin Impact
Before the battle, read some useful tips that will help you kill the Seahorse of the Thousand-Year Pearl.
Before the fight, use potions and food with buffs


The table shows the most beneficial dishes for the buff. There are many recipes in the game to strengthen the characters, you can cook any other option depending on your resources.
| Food | Effect | Crafting recipe |
|---|---|---|
 Delicious "Temptation of the Adept"
 |
Increases the attack power of all party by 372. and crit chance. hit by 12% for 300 sec. In co-op mode, this effect only applies to your character. | 4 ham + 3 crab + 3 shrimp meat + 3 matsutake. |
 Delicious meat platter
 |
Increases physical damage to all party by 40% for 300 sec. In co-op mode, this effect only applies to your character. | 1 ham + 1 bacon + 1 sausage + 1 mint. |
 Delicious soup "Three tastes"
 |
Increases the shield strength of all party by 30% for 300 seconds. In co-op mode, this effect only applies to your character. | 2 hams + 2 poultry + 1 bamboo shoot + 1 mushroom. |
 delicious lotus biscuits
 |
Increases the Defense of all party by 235. within 300 sec. In co-op mode, this effect only applies to your character. | 4 almonds + 2 flour + 2 oils + 1 sugar. |
 Delicious aromatic puree
 |
Increases the attack power of all party by 228. within 300 sec. In co-op mode, this effect only applies to your character. | 6 potatoes + 4 sour cream + 3 peppers (seasoning). |
 Delicious unagi chazuke
 |
Increases the healing bonus of all party by 20% for 300 seconds. In co-op mode, this effect only applies to your character. | 4 eels + 3 rice + 3 seaweed + 1 salt. |
 Delicious "Grow Mountain"
 |
Increases crit chance. hit all party by 20% for 300 sec. In co-op mode, this effect only applies to your character. | 3 raw meat + 3 potatoes + 1 fireweed + 1 cheese. |
Destroy the pearl of another sea

Attack the Seahorse's horn by summoning elemental reactions to quickly remove the shield and disarm.
Destroy the resonating coral spheres

During the battle, the Seahorse is protected by a shield from the foreign pearl. Cause elemental reactions to destroy coral spheres, each of which further weakens him. If you didn’t manage to destroy everything at once, after a while they will appear again.
Dodge attacks

Most of the boss's hits deal area damage and leave behind puddles. Watch your surroundings and attack markers to avoid damage.
How long does it take for the Thousand-Year Pearl Seahorse to recover?

The Seahorse of the Thousand-Year Pearl, like other world bosses, recovers in standard time in 3 minutes... Use Adventurer's Handbookto track its occurrence. Restart the game or teleport to another location for the boss to appear in the arena.
Achievements for the Millennium Pearl Seahorse
During the battle with the Seahorse, you can get several achievements.
Pebble Collector
Destroy the Alien Pearl without damaging the Resonating Coral Orb while the Millennium Pearl Seahorse channels Fontmere's Ancient Thunder. Reward: source stones ×5.
I will conquer the storm!

Defeat the Seahorse of the Thousand-Year Pearl as he attempts to restore the Pearl of the Other Sea. Reward: source stones ×5.
Rewards for defeating the Millennium Pearl Seahorse

After defeating the Millennium Pearl Seahorse, the following rewards can be obtained by activating the Artery Flower for 40 units resin:
- Adventure EXP ×200.
- mora.
- Clorinda.
- Shards, fragments, pieces and gems amethyst Vajrad – resources for raising Electro characters.
Artifacts:
- 5-4⭐Gladiator’s Finale.
- 5-4⭐Itinerant ensemble.
- 4-3⭐Exile.
- 4-3⭐Instructor.
- 4-3⭐Lightning Shaman (Crown of the Mind).
- 3⭐ Healer.
We hope that this guide helped you find out how to get to the world boss and kill the Thousand-Year Pearl Seahorse in Genshin Impact. If you have any questions, ask them in the comments. Stay tuned for new releases guide to other bosses.