Detailed guide to Labyrinth Warriors in Genshin impact 2.2 to all tests. Learn how to open and complete the event to receive free Xinyan.

tsurumi island south of Inazuma. Along with the last part of the Electro Region, various events will be launched that will allow you to have a lot of fun and collect valuable rewards.
Labyrinth Warriors in Genshin Impact 2.2 - one of the main events in patch 2.2. ing combat tests in specially prepared dungeons, players can receive valuable rewards, including free Xinyan. A great opportunity to unlock or upgrade this physical . The following is a detailed guide for the age of the Labyrinth Warriors in Genshin Impact.
Event dates
The warriors of the labyrinth have begun 21 2021 October, the и ended November 8, 2021. Tests are divided into stages:
- Sinister domain – from 21.10.2021.
- Violent contradiction – from 24.10.2021.
- vengeful forest – from 27.10.2021.
- Echoes of extinction – from 27.10.2021.
- Complete destruction – from 30.10.2021.
The work of the store also includes access to two sections:
- Trial Treasure I – from 21.10.2021.
- Trial Treasure II – from 27.10.2021.
Conditions of participation
To access the event, the traveler must have at least Adventure Rank 30. Players also need to complete Archon's task “Vol. II. Chapter III: All-seeing God, mortal world».
How to play Labyrinth Warriors in Genshin Impact
Starting from the first stage, a new level will open every three days in the event. There will be 5 stages in total. Find the Ommyo Mystic Chamber on the map and go there with your companion Shiki Taisho (he will be of great help in the trials, since he owns the magical energy of the amulets).

Enter the challenge by assembling your squad of fighters and a reserve (reserve team), as well as defining single buffs for them - Shikifoods. In total, the game features 9 types of Shikifood, 3 of which can be applied to a squad that is part of a particular challenge.

Enter the dungeon, explore the rooms and complete the challenge.

Inside the dungeon, the player is waiting for 2 floors with several rooms (see the plan of the dungeons with trials below).

You can advance through the dungeon to the final test by defeating enemies at the Apparatus of Judgment, which are on each floor. The path to the room with this device can be found using a special button added to the mini-map interface.

In the test rooms you can find various mechanisms and chests. Access to some of them opens only after the successful activation of devices from the previous room.

In battle, you can activate Shikifuda obtained at the beginning of the test by pressing the corresponding interface button added to the skill .
Upon defeating the apparatus of battle, rage or judgment, the player will receive an amulet that gives bonuses in battle like buffs Twisted Abyss. Also, these bonuses can be obtained from the amulet apparatus, but there is a risk of finding a curse seal in it, which will impose a debuff on the characters. You can use the empty Shikifud (given out for completing challenges) to draw amulets cards without finding a suitable one.

Also, when exploring the dungeon, you can get empty copies. They can be used to enhance the magic of Shiki Taishō's amulets, making them even more powerful in aiding trials.
 During combat trials, various conditions can be fulfilled, which will bring the player individual rewards along with goods from the in-event store.

When exiting a challenge, there is a "Leave" button that allows you to save your progress. For a full reset, use the "End test" button.
All buffs Maze Warriors
Players who know and can use all the improvements offered before entering and in the Mystic Chamber itself will be able to quickly the tests.
All seafoods
| number | Name | Description |
|---|---|---|
| 1 |  Seal of Fire
 |
Creates a barrier of fire, inside which the character deals 60% more damage, but also takes 20% more damage. This barrier exists for 12 seconds (no more than 1 at a time). |
| 2 |  Seal of Thunder
 |
Creates a thunder barrier, inside which the cooldown of the ult and E-shki is reduced by 10%. Every 3 seconds, 4 units of energy are restored, and the barrier itself exists for 12 seconds (no more than 1 piece at a time). |
| 3 |  wind barrier
 |
Creates a wind barrier inside which heroes jump much faster, and have 10% faster attack and movement speed. Barrier existence time is 12 seconds (no more than 1 piece at the same time). |
| 4 |  call for impulses
 |
Summons a spirit of gusts that pulls enemies towards him for 6 seconds. When the spirit is destroyed or timed out, a shock wave is created that attacks enemies with Anemo damage and knocks them into the air. There cannot be more than one spirit of impulses on the field. |
| 5 |  blizzard call
 |
Summons a blizzard spirit that deals AoE Cryo damage to nearby enemies every 2 seconds. He stays on the field for 8 seconds. Enemies under this effect will have their resistances (Physical and Elemental) reduced by 20%. No more than one spirit can be summoned at a time. |
| 6 |  seething call
 |
Summons a seething spirit that attacks nearby enemies with Hydro damage every 2 seconds. There is a spirit for 6 seconds. When destroyed or timed out, it unleashes a shockwave that deals Hydro damage to surrounding targets and creates water bubbles that trap three random nearby enemies. Captured enemies receive 70% less healing for 10 seconds. No more than one seething spirit can exist at a time. If the only enemy nearby is very large during the explosion, bubbles will not appear. |
| 7 |  water of life
 |
Restores 4000 HP to all party , then 5 HP and 800 stamina every second for 20 seconds. |
| 8 |  stone hardness
 |
Increases the active character's interrupt resistance and reduces the party's damage taken by 50% for 12 seconds. |
| 9 |  Thunder Orb
 |
Launches an orb of thunder that deals Electro damage in an area. For each enemy attacked, 2 additional elemental particles are generated. The maximum number of received particles is no more than 6. |
All amulets
| number | Name | Type | Description |
|---|---|---|---|
| 1 | Tactics: Burning Sky | character enhancement | When the active character activates the Steam reaction on a nearby enemy, a shockwave is created that damages nearby targets. The effect does not trigger more than once every 10 seconds. |
| 2 | Tactics: Edge of the Mist | character enhancement | Anemo damage bonus +10% for all party . |
| 3 | Hiding: Walk | Gain Research | Cancels the negative effects of the next two curse fields. |
| 4 | Cover-up: Decay | Gain Research | For each destroyed destroyable object, except for explosive barrels, the energy recovery of squad is increased by 2%. The effect stacks up to 10 times. |
| 5 | Tactics: Insolence | Strengthening shikifuda | When the active character is within the area of the wind barrier, attack speed is increased by an additional 5%. |
| 6 | Tactics: Scroll of Victory | character enhancement | When the active character's HP is above 70%, the elemental skill's damage is increased by 10%. |
| 7 | Tactics: Swift Lightning | character enhancement | When the active character creates the Superconductor reaction on an enemy, a shockwave is released that deals AoE damage. The effect does not trigger more than once every 10 seconds. |
| 8 | Concealment: Supply | Strengthening shikifuda | Restores 1 use of all Shikifood available to the player. |
| 9 | Concealment: Insight | Gain Research | Clears the fog on the current floor and marks the types of all rooms. |
| 10 | Tactics: Deafening Storm | character enhancement | Increases the Electro damage bonus of all party by 10%. |
| 11 | Hiding: Thrift | Strengthening shikifuda | If you successfully use Skifood, there is a 33% chance that it will not be spent. |
| 12 | Tactics: Skystorm | character enhancement | When the active character activates the Overload reaction on an enemy, a shockwave is created with AoE damage. The effect occurs no more than once every 10 seconds. |
| 13 | Tactics: Fortitude | character enhancement | The protection of all of the squad is increased by 15%. |
| 14 | Tactics: Seething Wave | character enhancement | The hydro damage bonus of squad is 10% higher. |
| 15 | Tactics: Spiky Frost | character enhancement | Cryo damage bonus for squad +10%. |
| 16 | Concealment: Durability of Rocks | Gain Research | Powder keg explosions do not knock up or damage characters. If there are enemies nearby with the Electro status, the Overload reaction will be triggered with damage and knocking up the target. |
| 17 | Tactics: Double-Edged Sword | character enhancement | Damage dealt by the active character is increased by 15% and damage taken by 10%. |
| 18 | Tactics: Shock and Awe | Strengthening shikifuda | Every 5 seconds, barriers created by Shikifuds cause an elemental explosion that deals AoE damage of the corresponding element. |
| 19 | Concealment: Ethereal | Gain Research | For each destroyed destroyable object (except exploding barrels), resistance to physical and elemental damage is increased by 1%. The effect stacks up to 10 times. |
| 20 | Tactics: Pairing | Strengthening shikifuda | Grants a moderate increase in the number of elemental parts generated by Shikifuda: Thunder Orb when it hits an enemy. |
| 21 | Tactics: Seal Break | character enhancement | Sprint leaves behind a seal that explodes after 1 second. Happens every 10 seconds. No more than 3 seals can exist at the same time. |
| 22 | Tactics: Sunset Fire | character enhancement | Increases the Pyro damage bonus of all party by 30%. |
| 23 | Concealment: Rumbling Thunder | Gain Research | Powder kegs deal 2000% more damage to enemies. |
| 24 | Tactics: Banish Evil | character enhancement | If the active character's stamina is above 70%, attacks against the target create a shockwave that deals AoE damage. The effect occurs no more than once every 5 seconds. |
| 25 | Tactics: Shattered Armor | Character buffs | When the active character activates the Superconductor reaction on the target, the enemy's physical resistance is increased by an additional 20%. |
| 26 | Concealment: Full Supply | Strengthening shikifuda | Restores the full number of Seafood charges. |
| 27 | Tactics: Skill | character enhancement | The character's charged attack consumes 50% less stamina. |
| 28 | Tactics: Sharp Throw | character enhancement | The active character gains the Seal of Throw Seal aura, increasing attack speed by 15%. Each enemy within the aura reduces its effectiveness by 5%. With three or more targets, the effect disappears altogether. |
| 29 | Tactics: Quick Break | character enhancement | The active character gains the Seal of Rapid Rip aura, increasing attack speed by 20%. Its effect disappears when there are three or more targets in the aura. |
| 30 | Tactics: Sharp Blade | character enhancement | The normal attack damage of squad is 8% higher. |
| 31 | Manifestation: Interpretation of Destiny | character enhancement | The effects of the constellation of four random characters from both units are increased by 1 level. |
| 32 | Tactics: Scroll of Dominance | character enhancement | When the active character's HP is above 70%, their elemental explosion damage is increased by 10%. |
| 33 | Tactics: Scroll of Resilience | character enhancement | When the HP of the active character is above 70%, the damage of normal, charged and falling attacks is 10% higher. |
| 34 | Tactics: Strong Thunder | Strengthening shikifuda | Shikifuda's Electro Damage: Thunder Orb increased by 45%. |
| 35 | Tactics: Quick Step | character enhancement | Character sprint consumes 50% less stamina. |
| 36 | Cover-up: Banishment | Gain Research | For each destroyed destroyable object, except for barrels of gunpowder, the defense of the squad is increased by 2%. The effect stacks up to 10 times. |
| 37 | Manifestation: True Form | character enhancement | The elemental skill damage of all party is 20% higher. |
All Seals of Curse
| number | Name | Description |
|---|---|---|
| 1 | Damage | One of the characters in the squad does not receive treatment or cannot be resurrected. The effect is valid only on the current floor. If squad have resurrection skills or ives, they can be used, but the player will not receive any effect. |
| 2 | Enemy arrogance | Enemies summoned by Combat, Rage, and Judgment Apparatuses on each floor have 20% more attack power. |
| 3 | Trap | A curse field will appear at a random location in the current challenge. |
Walkthrough Labyrinth Warriors in Genshin Impact
You can access the first stage by going to quest "A difficult situation" in the task of the legends "Warriors of the Labyrinth: Part I". To do this, come to the Inazuma Adventurers Guild and talk to Katerina. She will tell you about the arrival in the Xinyan archipelago and tell you where to find the main rock and roll girl Teyvat. Follow her to the Tenryo Commission. After talking with Xinyan, approach the Tenryo employee who is standing nearby. After a dialogue with Sarah go to the nameless dungeon of Araumi.
At the dungeon, the player is waiting for an ambush of monsters. You need to kill two groups of hilichurls and go to the paper figure lying on the stone at the entrance. Talk to Shiki Taisho about what's going on, and then go to the onmyo Mystic Chamber to take her test for the first time. Inside the heroes will wait Tartaglia (Childe)who also needs to be spoken to. After the dialogue, you need to sequentially go through the first and second floors of the Sinister Domain. After successfully completing all the challenges, watch the long dialogue scenes and get a reward for completing the quest - 60 Source Stones and 3 Hero Experience cards.
Further, detailed walkthroughs and floor maps of the Labyrinth Warriors will be presented as they are studied. Bookmark the article to have access to it throughout the event.
Sinister domain
Below are detailed maps of each floor with labels of possible secrets.
First floor
 The type of device in the room is randomly generated! The general floor plan and placement of hidden chests is the same for all players.
Second floor

Video walkthrough
We suggest eliminating any difficulties during the age using the video guides presented below.

Violent contradiction
The second stage of the event opens with the quest "Determination to move forward." After all the dialogues inside the Mystic Chamber, the player is informed that there are special protective equipment attracting enemy attacks and accumulating a charge. They release a shockwave when fully charged.
1 floor
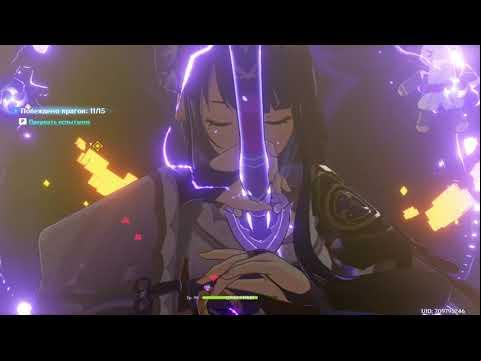
Please note that mainly in battles there are opponents of Cryo- and Electro-elements. The final boss is a Cryo-Hypostasis, with all of his mechanics retained except for the Frost accumulation that occurs in his default arena in Dragonspine.

2 floor
The elemental focus of the second floor matches the first, but at the end, the boss is Lavachurl with a frost shell, as well as two Abyssal Cryo-Mages.

Video walkthrough
vengeful forest
This test begins with the age of the quest "Down with lies." According to the standard, start tracking the task and move the time to 08:00-12:00 the next day in the game. Meet with Xinyan and enter the Vengeful Forest.
1 floor
The problem is Hydro Ghosts, which create areas around the player with Hydro damage and healing. Melee players have a problem when 2 of these ghosts easily keep each other and other enemies with a lot of HP present on the field. It is worth focusing on the destruction of the elemental flying monsters. Ideally, they should be fired at with long-range attacks by some well-damaging archers.
 2 floor


Video walkthrough
Echoes of extinction
It is enough to talk with Shiki Taisho to receive the rewards of the starting quest and open another labyrinth.
1 floor

2 floor

Video walkthrough

Complete destruction
Video walkthrough
How to assemble a squad for the Labyrinth Warriors
In fact, there is no clear strategy for each floor. We recommend using your best heroes for the main squad, and in to put those who are immediately behind them in quality. Properly selected amulets and shikifudas allow you to disperse all of the squad, enhancing their elemental damage, punches and combat dynamics. The author was enough one detachment (Qi qi) to close both floors of the Sinister Realm in Labyrinth Warriors.
Awards
For the ed tests, players will receive worn tablets. This is the main currency of the event and can be exchanged for the following rewards:
- source stones;
- Crown of Insight (Wisdom);
- gems for exalting characters;
- scrolls for leveling talents;
- experience cards;
- weapon enhancement ore;
- sea.

If you collect 4000 Worn Tablets during the entire event and complete the Taisho Path quest, you can exchange 1000 tablets for a free Xinyan (once).

Bookmark this page to quickly access the up-to-date Labyrinth Warriors guide after the event. Write in the comments if you need the help of authors or other readers.
how to pick up the chest in the room upstairs on the third floor (vengeful forest)?
Look for an activator on one of the columns to lower the stairs. It's very subtle, but it's there.
Does it make sense to go through the last level of the labyrinth, if you won any kind of no?
30 gems for a flawless playthrough
I have a question about the second labyrinth... I went through the first floor and died at the first battle of the second one... Can I somehow go to the second level right away??? When I enter, it throws me at the first ...
No. It is forbidden. The progress of the floor is saved only so that you can leave, having ed the first, and then return to the age of the second. If you die, then go through everything from the beginning.